

With HubSpot's Content Optimization System, or COS, users can create entire websites, blogs, landing pages and emails that are mobile-optimized out-of-box. These assets also integrate with HubSpot’s full suite of inbound marketing tools.
Although HubSpot offers many pre-built templates and a basic Template Builder tool (no coding required), they also allow you to build templates using HubSpot Markup Language (HubL). Developers can find this tool within a Code Editor to add more advanced customizations and features. As a HubSpot Diamond Agency Partner, our development team has helped multiple clients create custom COS templates for their brands.
This blog provides a high-level overview and some general tips for building customized templates on the HubSpot COS while primarily using the Code Editor tool.
Setting Up & Editing Your Template Layout
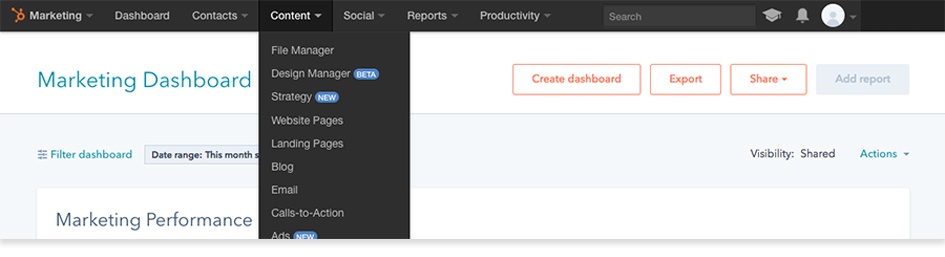
1. Accessing HubSpot's Design Manager
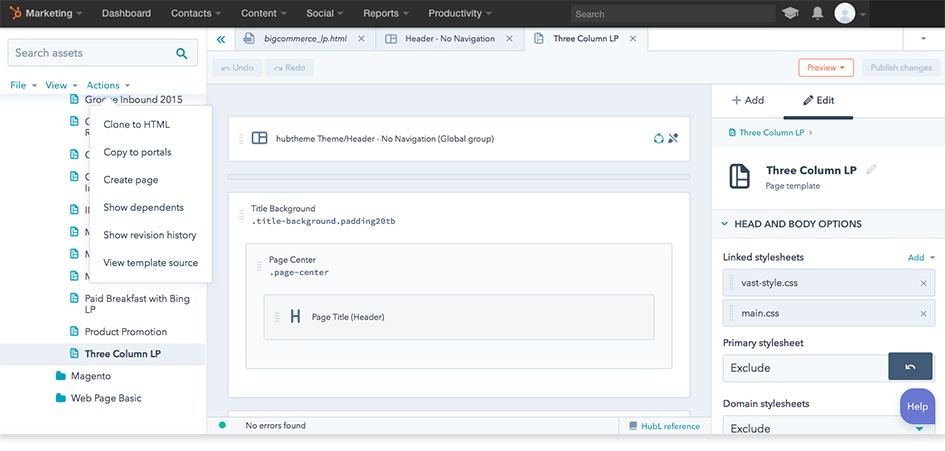
You can access HubSpot's Design Manager by logging into your HubSpot account and navigating to Content > Design Manager within the top navigation bar, as shown below:
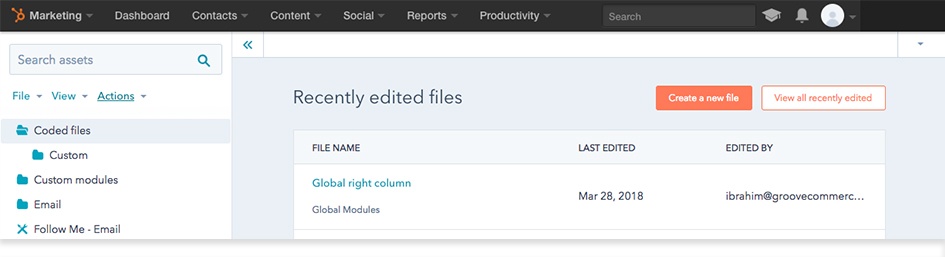
2. Setting Up Your Templates
To get started, select "New File" on the Design Manager page, as shown below:
Next, a small light box will pop up to select a type of HubSpot template. For this blog, I’ll be using the Code Editor option. Select HTML & HUBL from the options below.
 Next, select "Template."
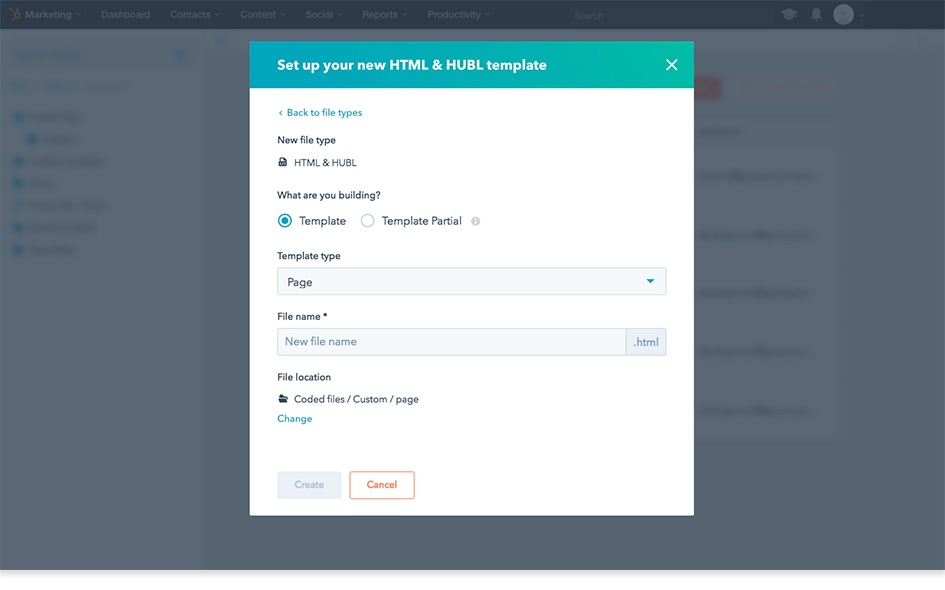
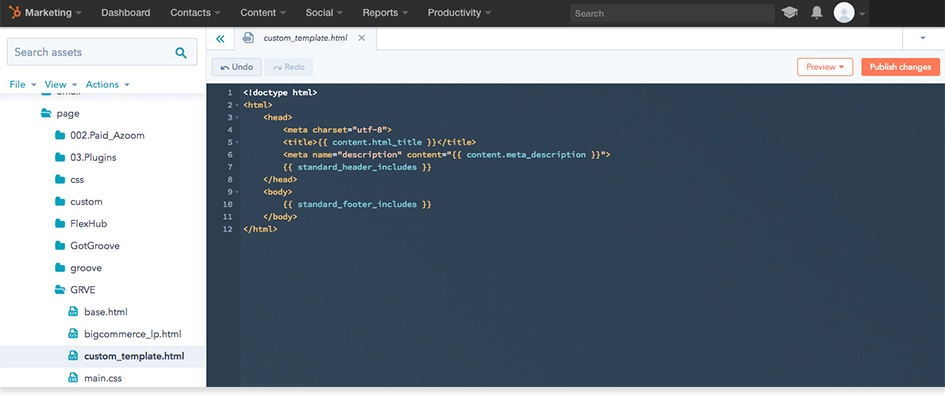
HubSpot will generate this basic markup for you to begin building your page template.
To save time (so that you’re not coding completely from scratch), create a basic layout using the Template Builder. Then, clone the template to a new file by selecting Actions > Clone to File. This will output an HTML file that includes the required HubL code. Caution: this can become messy if you're not careful, so it is up to you whether or not you want to go this path vs. coding from scratch.
I personally prefer to build out the template with the Template Builder first. However, it is entirely possible to write up unique html by including the appropriate module tags and standard header and footer tokens:
Include this in your header:
{{standard_header_includes}}
Include this in your footer:
{{standard_footer_includes}}
3. Adding Tokens & Tags
What are tokens and tags, you ask? According to the HubL Syntax Reference Doc:
“Templates contain tokens and tags. Tokens are indicated by a curl brace syntax: {{ content.name }} and are replaced with values when the template is processed. Tags control the logic of the template and provide support for various components.”
Certain tokens can only work in certain content types. For example, if you were to use an email token such as {{unsubscribe_link}} inside of a landing page template, the template may not work. HubSpot does break these down by template type.
4. Adding Modules
Modules allow dynamic user-defined content in templates. Although you can choose from 20 standard modules, you can also create and use your own modules from scratch. Note that “modules” and “widgets” are the same thing (HubSpot uses these terms interchangeably).
Your standard module syntax looks like:
{% module_type "a_unique_name" label="Label that shows up in the editor", attr="val" %}
- module_type – the type of module you are using, for example: rich_text, or image
- “a_unique_name” – each module must have a unique name. If two modules have duplicate names, only one will show up
- label – text that the end-user will see in the template's module editor
- attribute & value – any additional parameters based on the module type that you are using. For example, an image module requires an “src” attribute to be defined
Again, HubSpot gives you a full breakdown of module types here.
5. Two Important Module Parameters to Keep in Mind
There are two extremely useful parameters that you should keep in mind when developing your templates: Export_to_template_context=True and No_wrapper=True.
Export_to_template_context=True
Including “export_to_template_content=True” allows you to export data from the module into your template using the syntax below:
{{ widget_data.((widget_name)).((param_name)) }}
Modules with export_to_template_context=True defined will not automatically display output in the template. For example, let’s say that you had an image module named “groove_image” set up in the front-end template module editor:
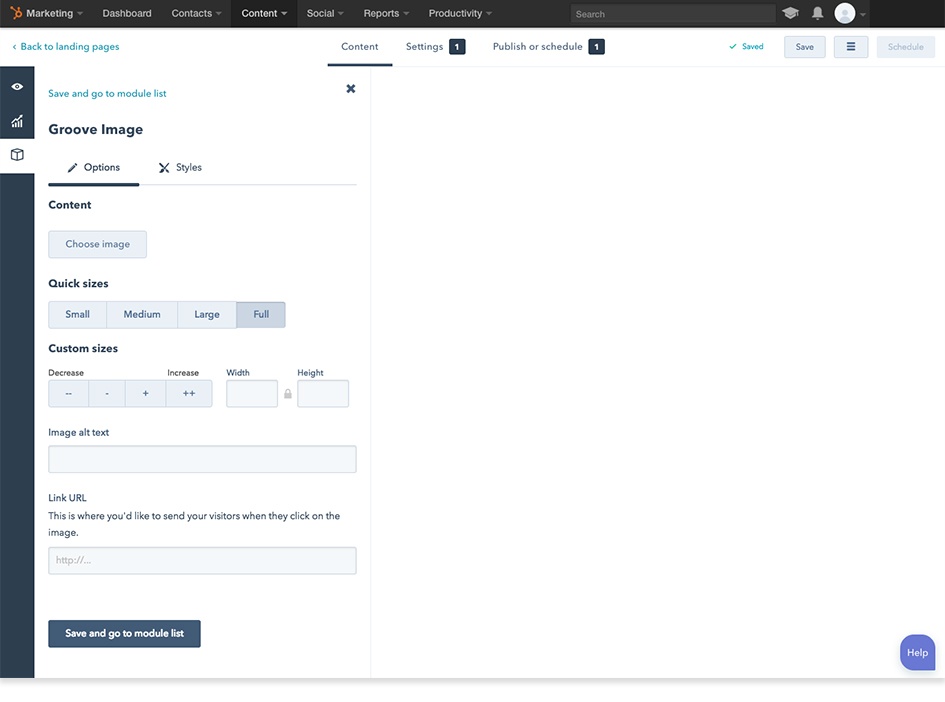
If you wanted to grab alt text in the template, you would write the following token:
{{ widget_data.groove_image.alt }}
This would print out “this is the ALT text”. If you want to grab the link URL, you would write the following:
{{ widget_data.groove_image.link }}
And so forth.
Adding export_to_template_context becomes incredibly helpful once you start building templates with more customization options. You can see the available parameters for each module if you go to the HubL Supported Modules Syntax Documentation.
For more useful tips using export_to_template_context, see the section below labeled Providing Options in the Template's Module Editor.
No_wrapper=True
This one's pretty simple but it's worth mentioning. By default, HubSpot wraps all module content in either div or span tags. Depending on your specific template needs, you may want to disable this by including no_wrapper=True in your module.
6. Making the Most of Your Grid Layout
HubSpot uses a 12-column grid system based on Bootstrap 2 (Bootstrap 4 is the most recent version). When working with the html file, you can stick to this framework or include and create your own. This page shows you the full code output for a sample template.
Providing Options in the Front-End Template Module Editor for More Advanced Customizations
Using coded files over the Template Builder allows you to exhibit greater control over the design and function of your templates. However, the following tips can help users who aren't familiar with HTML and need to make edits directly in the front-end template editor.
Taking Advantage of the Choice Module and Conditional Logic
The following tips will help you create options including specific stylings or displaying entire blocks of content. For convenience purposes, I've marked the important code elements in pink.
There are two parts to this customization: setting up the “choice” module, and then wrapping it together with if-statements. This is otherwise referred to as conditional logic. Let’s say that we want to create an optional template section.
1. Setting Up the Choice Module
The first step makes use of the “choice” module. This module will offer the end-user a pre-determined list of values.
The HubL module tag will look like this:
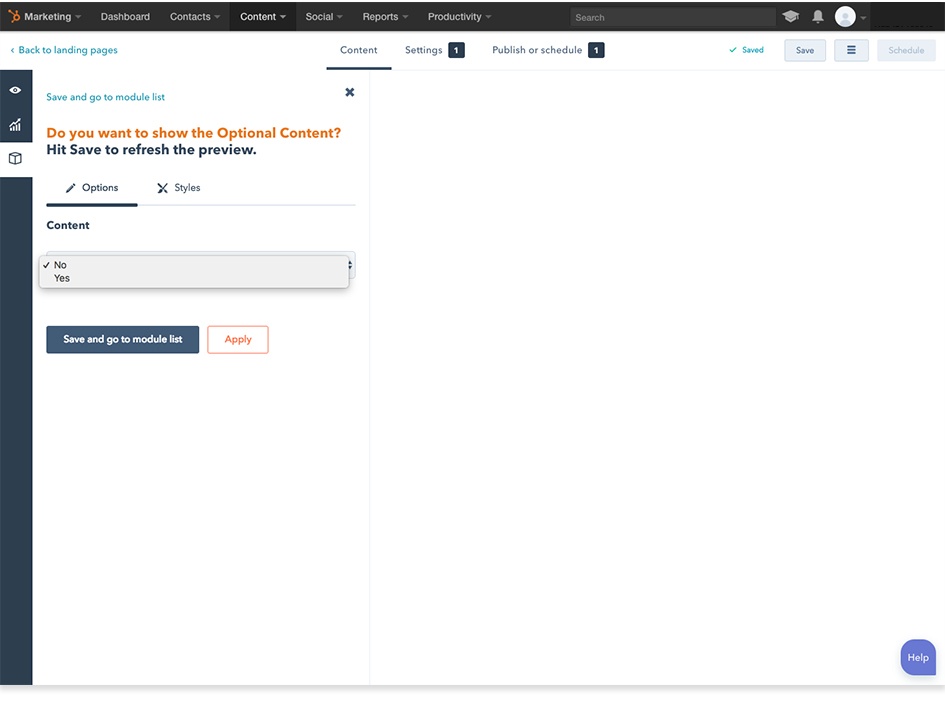
{% choice "optional_content_block" label="<span style='color:#e8771b;'>Do you want to show the Optional Content?</span><span>Hit Save to refresh the preview.</span>", choices="No,Yes", export_to_template_context=True %}
I am assigning this block the name “optional_content_block” and the choices are “No,Yes”.
It is imperative that you include export_to_template_context=True or else you will be unable to reference any of the module’s data within the template. It's also worth noting that the <span> tags are optional in the label. However, I feel they help distinguish this option on the module editor screen.
You can create as many choices as you like – these will populate as a dropdown list. I've set "No" first so that this module will default to "No" (that is, it won't randomly display things it shouldn’t).
It will render on the template module editor as the following:
2. Using Conditional Logic to Wrap it Together
Hubspot offers tags for conditional logic. This snippet from the HubL Documentation gives a colorful example of its usage. We will use this tag to toggle different conditions. The option that you select in the Code Editor is saved and its value can be called in the template with the token:
{{ widget_data.optional_content_block.value }}
Please note how this token follows the same convention as defined above:
{{ widget_data.((widget_name)).((param_name)) }}
You can then set up conditionals for the module with the following code:
{% if widget_data.optional_content_block.value == "Yes" %}
<div>
{% else %}
<div style="display:none;">
{% endif %}
Now, this section will only display if the end-user selects and saves “Yes.” With a little creativity, you can set this up for a number of uses. For example, the following defines different css styles based on your choice:
{% choice "optional_styles" label="Optional CSS Styles<span>Hit Save to refresh the preview.</span>", choices="Strong,Italics", export_to_template_context=True %}
{% if widget_data.optional_styles.value == "Strong" %}
 <style type="text/css">
 span { font-weight: bold; }
 </style>
 {% endif %}
{% if widget_data.optional_styles.value == "Italics" %}
 <style type="text/css">
 span { font-style: italic; }
 </style>
 {% endif %}
Setting User-Defined Background Images
Sometimes, you might be asked to create a template that swaps out background images. You could do some CSS magic with absolute positioning and z-indexes (and that definitely works), but the simplest way is to add “export_to_template_context=True” to an image module. There are two ways to go about this:
1. Add an Image Module
Add an image module anywhere in the template (although I would recommend that higher is better).
{% linked_image "background_image" label="Background Image",
export_to_template_context=True %}
2. Set up CSS
Set up your CSS and place the proper token where applicable.
body { background:url('{{ widget_data.background_image.src }}'); }
And voila! You’ve now created helpful options for non-technical users to adjust templates directly in HubSpot’s front-end template module editor.
Final Thoughts
Although this is not a comprehensive technical guide to custom COS templates on HubSpot COS, we hope it gives you a high-level overview and answers some of your general questions. Most importantly, we are happy to help with any development questions or projects. Simply fill out the form below to get in touch!

20 Best Shopify Apps For Your eCommerce Store
