
![32 AI eCommerce Tools To Start Using Today [2024]](https://www.groovecommerce.com/hubfs/2023%20Website/Blogs/AI%20Blog%20Social%20Media%20Tools/7%20AI%20Tools%20For%20eCommerce%20Merchants%20To%20Start%20Using%20Today%20-%20Promo%20Image%20Large.jpeg)


As a developer and self-proclaimed Magento evangelist, I’m a huge fan of the platform's multiple storefront functionality. What I’m referring to is the advanced feature set which allows eTailers to host multiple storefronts in Magento within one installation and on the same server without having to duplicate files.
In this blog post, I am going to walk you through the steps required for creating multiple storefronts in Magento and the three URL structure options for viewing new storefronts within a browser.
Disclaimer
In the following scenario, I will be creating three new stores in Magento based on the three URL structure options that are available. For the purposes of this blog, I assume that you already have Magento installed. The version that I am using is Magento Enterprise Edition 1.13.1, but the steps that I will be outlining also work for Magento Community Edition 1.4 and above. Please note that this guide also assumes that you have a basic knowledge of Magento, so I don’t explain every little detail about the menus and configurations like I have in past blogs - this is more of a high-level overview.
Create a New Magento Storefront
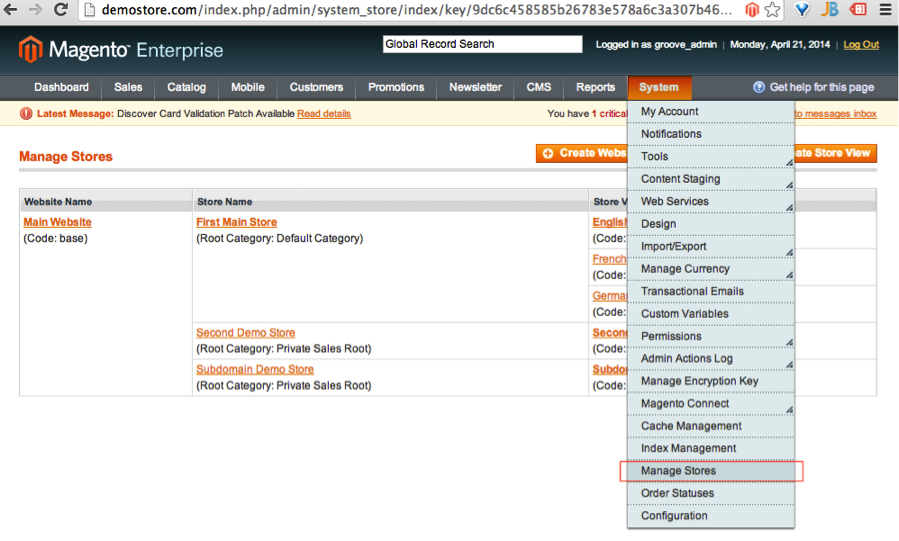
Log into your admin console and go to System->Configuration->Manage Stores as shown below:

Next, click Create Store and give the store a name. You also have the ability to use a different catalog. Because sample data is already installed on this instance, I will use the Private Sales catalog to differentiate from the primary store. Click save when all options are selected.

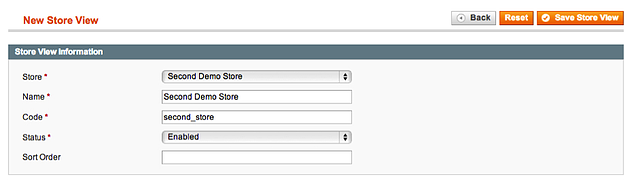
Finally, create the store view for your storefront. If we were creating additional store views in different languages, I would specify the language in the name or store view code, but since we aren’t getting that complicated today, I will stick with the same name used in the store creation step. Don’t forget to change the default store value to the store we just created and set the status to enabled. Also, please make note of the store view code and copy that down somewhere - we will need that in a later step.
Choosing Your New Store's URL Structure
This step will ultimately determine the remainder of the Magneto setup. Ask yourself the following questions and see which path makes the most sense for your particular use case:
- Do you want your new site to be indexed along with the primary site (demostore.com/secondaryStore)?
- Do you want your new site to be a subdomain of the primary site (subdomain.demoStore.com)?
- Is this a totally new store with its own URL (secondDemo.com)?
Using the following steps, I am able to complete the setup with any of those conditions.
Modifying URLs in Magento
Go to System Configuration, change the default configuration scope to the store view you just created, and open the unsecure/secure URL tabs. Change the base URLs based on your answer to the above question. Save configuration.

Using a New Domain (secondDemo.com) or Subdomain (subdomain.demoStore.com) for URL Structure
Adjust your server configuration such that the new domain goes to the existing domain’s webroot. Be careful not to affect the existing domain. For this guide I have been working locally with MAMP Pro, because of this it is relatively easy to make the required changes.


The final step involves adjusting the .htaccess file to adjust two Magento variables. Add the following lines of code to direct customers to your new store (unless you use Nginx in which case skip these lines of code and see below). Note that this is where the store view code from earlier comes into play.
RewriteCond %{HTTP_HOST} .*seconddemo\.com [NC]
RewriteRule .* - [E=MAGE_RUN_CODE:second_store]
RewriteCond %{HTTP_HOST} .*seconddemo\.com [NC]
RewriteRule .* - [E=MAGE_RUN_TYPE:store]
RewriteCond %{HTTP_HOST} .*subdomain.demostore\.com [NC]
RewriteRule .* - [E=MAGE_RUN_CODE:subdomain_store]
RewriteCond %{HTTP_HOST} .*subdomain.demostore\.com [NC]
RewriteRule .* - [E=MAGE_RUN_TYPE:store]
If you use Nginx, ignore the above .htaccess method as it will be useless to you. My recommendation is to either adjust the Nginx configuration file to reflect the changes or edit the last line of the index.php file by adding an "if statement" and using the $_SERVER variable. Something along the lines of:
if($_SERVER[‘HTTP_HOST’] = ‘seconddemo.com’) Mage::run(second_store, ‘store’);
elseif($_SERVER[‘HTTP_HOST’] = ‘subdomain.demostore.com’)
Mage::run(subdomain_store, ‘store’);
else Mage::run($mageRunCode, $mageRunType);
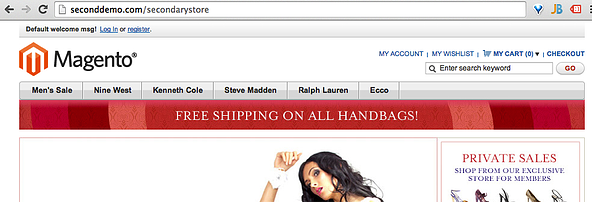
The final result should be a new store using the new domain or subdomain you chose rendering the catalog you selected.
Adding a New Store to a Primary Domain (demostore.com/secondaryStore) for URL Structure
This method requires making some changes to the server using command-line, so I'm assuming that you can do this. If not, you may be able to make a request to your hosting provider to do this.
Create a new directory within your webroot with the same name as the URL you selected. Within that directory, you will be creating a series of symlinks (shortcuts) that lead to directories in the primary domain’s webroot.
For easy copy-paste reference, the symlink lines are below:
ln -s ../app/ app
ln -s ../includes/ includes
ln -s ../js/ js
ln -s ../lib/ lib
ln -s ../media/ media
ln -s ../skin/ skin
ln -s ../var/ var
At this point, we are essentially tricking the server into thinking there is a Magento instance within the new directory. You will also need to create a copy of the index.php and .htaccess files in the new directory. The .htacces file does not need to be edited, but the final line in the index.php file needs the variables replaced with the store code of your new store.

With these changes in place, the secondary domain will render just as the other two examples did and you'll be all set:
Final Thoughts
Today we have gone over the steps required for creating multiple storefronts in Magento as well as the three different ways to view these stores from the browser (depending on which URL structure you select). Have any specific questions or comments about my walkthrough? Or, need help with overall Magento development? Please don't hesitate to drop us a line at Groove and we'd be happy to chat!